When unified labeling was announce that it is no longer in Preview mode, and here it comes the new application called, AzInfoProtection_UL, you could find the link to download this application at the references below of this post. There is the Preview application called, AzInfoProtection_UL_Preview.
Before unified labeling, the only application has for Azure Information Protection is AzInfoProtection (Classic client). So what so different about them? Before we jump into getting to know what are the differences, let’s understand the definition or meaning.
Classic client
Azure Information Protection is a new enhancement of rights management and it is manage from Azure portal. If you need scanner and HYOK (your own key) then you install AzInfoProtection.exe (User Profile based installer) or AzInfoProtection_MSI_for_central_deployment (System installer) client application.
Classic clientClassic clientThis part shows Azure labels and Office 365 Sensitivity labels. Let’s take “DLP View Only” is a label custom created from Office 365.
Unified labeling
Azure Information Protection with Unified Labeling was just announce somewhere the month of June or July 2019. Unified Labeling means that your labels can be manage either from the Azure portal or from Office 365 Security and Compliance portal. This feature is enabled by default. You can migrate your labels from Azure to Office 365 Security and Compliance. Unified Labeling supports for more Office 365 products, such as Microsoft Teams. If you do not need HYOK protection (your own key) or the scanner, then you install AzInfoProtection_UL.exe (User Profile) or AzInfoProtection_UL_MSI_for_central_deployment (System installer) client application.
This is how it looks like first install, notice the icon is differentSelect on the “Sensitivity” icon and click “Show Bar”These are my Office 365 Sensitivity labels
If you would like to deep-dive the comparison of these 2 application here is a helpful link.
Good day everyone! Keep staying positive even the day is bad. As a community member for Azure Community Singapore since the month of July or August 2019, this community is not just answering questions, this community has a monthly speaking meetup and yea I joined, I was “like yea, I would like to join and share about Information Protection”. However, the downside is that I can’t travel to Singapore every month just for this speaking meetup. Discuss and Discuss and they reach an end result, “let’s try doing it as YouTube Live!”.
The community set up 2 sessions, Azure Information Protection by Sabrina Kay and Azure Sphere by Snake Chia.
We went through twice of the rehearsal after working hours, the first rehearsal was to test out how we can do YouTube live with multiple users, we faced challenges like internet congestion and delay, try out implement QoS on the machine, hopes to improve connectivity and communication. On the last rehearsal, we did a dry run and getting the timeline and order of switching speaker, making sure everything fines. Thanks for pulling this rehearsal together.
Today I decided to say goodbye to a PowerShell command module, its name is Azure Rights Management, for short AADRM. Why? If you remember or read my old blog post about Rights Management in Azure then you know why I am saying Goodbye to it. Remember the old Azure Portal? https://manage.windowsazure.com
Before saying Goodbye, I was glad to experience this generation of Azure Rights Management, in 2017 and seeing the improvement and growth of it makes me happy. Now I am moving forward to the AIP Service module, where the new Rights Management named “Azure Information Protection”. AADRM End-of-life is on July 2020. During my first experience with AADRM, it was quite complicated to understand and manage it, because of its commands different from what I usually do.
Alright to install AIP Service module, what you should do first? When you already have AADRM installed, you have to uninstall it via PowerShell Run as Administrator. If you try to install the AIP Service module before uninstalling AADRM, it will give you an error saying “You already have the following commands ‘Get-AADRM and etc…’“.
This new AIP Service Module contains the new commands which are the AIP Service commands, don’t worry this new module still has the AADRM commands.
If you happen to have MFA enabled, AADRM module and the new AIP service module does support.
If your Windows client is a joined to the domain and has limited privilege, to download software or applications. Thus, requirements a local administrator or an administrator account to proceed with these changes.
Once you have finish download, double click on the installer
Select “I agree”
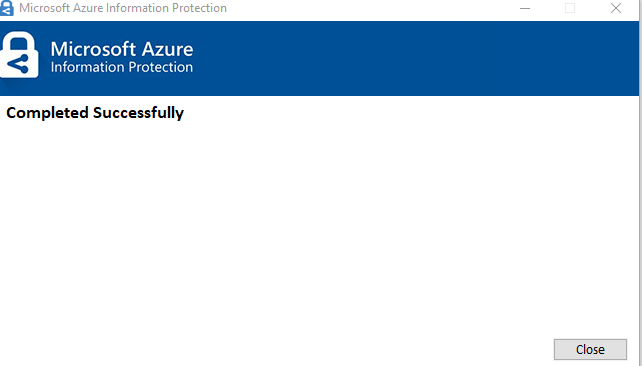
Select “close”, once completed
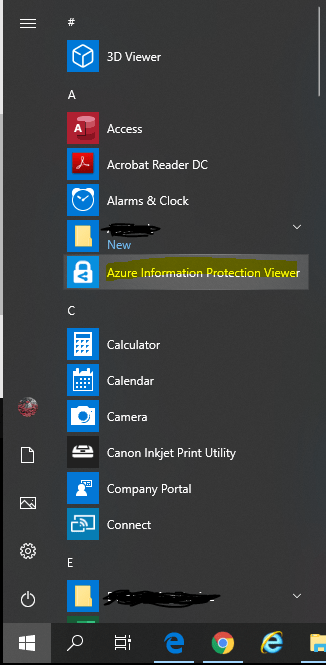
You will find the Azure Information Protection Viewer application shown and your office application has the Azure Information Protection labels shown too
Select Start or Windows button
There is another way to have this installed in the client’s device that is joined to the domain, which is through GPO (Group Policy Management).
Just having thought about how to extract the AIP File status from storage via PowerShell Scripting. Hope this helps. Do leave comments if you find some faulty or beside faulty.
*Note:
This script doesn’t limit to what you want, you could modify it.
Assumption;
Has AADRM module installed
Has the Execution Policy modified
Has PowerShell 3.0 above or Azure Module PowerShell console
Below is the script;
#Purpose: To export data of AIP labelled files from users devices
#You can do this into a GPO but beware of vulnerabilities and 50-50 percent chance that this could actually work
#If you want to run this in a GPO, you have to modify this script

#Connect to the aadrm service
$AADRM = Connect-AADRMService

if($AADRM){
#Please enter the path
 $ReadPath = Read-Host -Prompt "Enter Path that you wish to check"
 $ReadPath = $ReadPath.ToString()
 $AIPFileStatus = Get-AIPFileStatus -Path "$ReadPath" | where-object {$_.IsLabeled -eq $true}

#Count number of AIP files inside the path
 $CountFile = $AIPFileStatus.Count
 Write-Host "There are total $CountFile AIP File(s)."

#Prompt for export
 $a = Read-Host -Prompt "Do you want to export this data? (Yes/No)"

 $CurrentDate = Get-Date
 $CurrentDate = $CurrentDate.ToString('MM-dd-yyyy_hh-mm-ss')

 If ($a -eq "Yes" -Or $a -eq "yes"){
 $Export = $AIPFileStatus | Export-Csv "AIPFileStatus_$CurrentDate.csv"
 Write-Host "Successfully Exported!"
 }

 else{
 Write-Host "End..."
 }

}
else{
 Write-Host "Fail to connect"
}
Rights Management definition is that it is a protection mechanism that uses encryption, identity, authentication to protect your emails and documents from unauthorized access. Imagine, that your emails and documents is the Hamster and Rights Management is the Hamster’s protective ball, the Hamster is inside the Ball and if you are not the owner of the hamster and you wish to touch it I doubt that it won’t bite you.
Cute and feisty hamster in a ball (from movie Bolt)
IRM- Information Rights Management
IRM stands for Information Rights Management/Azure Rights Management, let’s talk about a history of IRM.
IRM is the older version RMS, you could only find it at Office 365 portal, and now with AIP available, IRM has become a component within the AIP. I think Microsoft has plans to slowly decommissioning/move away IRM, because I’ve noticed that the usual modification method of IRM templates has closed since January,2018. The usual method to modify IRM templates was from the old portal of Microsoft Azure. Now the only way to modify the templates are through PowerShell.
Anyway, it also has it own separated activation via GUI;
For exchange online IRM you have to activate from office 365 portal > admin > settings > services & add-ins > Rights Management/ Azure Information Protection
For SharePoint online, activate it from office 365 portal > admin > admin center > SharePoint > Settings > Select Use the IRM service specified in your organization > Refresh IRM settings
Or you could just make use of PowerShell to activate IRM (Make sure you got all requirements ready);
Connect to AADRM services
Type in the PowerShell “Enable-Aadrm”
Yea, so the steps are actually not brain surgery. What I like about PowerShell is that its code is understandable just by looking at it. If you compare PowerShell and C++, than you know what I mean.
*Note:
IRM can’t protect documents that are not Office Apps
IRM can’t provide you much tracking details of your protected documents
Exchange Online IRM and SharePoint Online IRM has different IRM management
SharePoint Online IRM, is based on a site not the whole SharePoint Online
SharePoint Online IRM, you can apply IRM on its list or library
No longer using GUI to configure IRM templates
IRM needs manual activation
License requires are Microsoft Enterprise E3 or E5
Doesn’t support mobile
Longer propagation to end users (make take to 2 hours (same goes to DLP labeling))
End Users has to select “Connect to Rights Management” in the outlook
AIP – Azure Information Protection
AIP is the new advanced technology/mechanism of RMS, it broke through the limitation of IRM capabilities. You can only see and management AIP in Microsoft Azure Portal (Yes, you still can see it as “Advanced feature” in Services & add-ins in Office 365 portal). The capability of AIP I could tell you is quite mind-blowing for me. It combines the IRM and DLP’s sensitive information mechanism to produce an advanced method to protect data.
To understand how to use AIP for me (hope it helps you too), you must understand steps to deploy and implement AIP 6 major points;
Label – Parent Label? or Sub Label?
Permission – View Only? Read Only?
DLP Sensitive Information – Trigger label automatic?
Apply to – Sales Department? External parties?
Policy – Who will hold this label as admin?
Label Admin – Sales Admin hold this label as admin
The minor points would be the notification, policy tips, access expiration date and so on.
Sadly, AIP doesn’t provide the capability to prevent data leak. Wait! Why not integrate AIP with DLP block policy function? Yes, you could do that and that is what the recommendation from Microsoft. DLP is Data Leak Protection (License of Microsoft Enterprise E3 or E5)
Minimum you could get AIP Plan 1 license for your global admins and users, to have the permission to use AIP. Once you buy AIP license and apply for the license, AIP will automatically activate for your organization (Exchange Online, OneDrive, and SharePoint Online). (Chill this won’t impact your users yet)
*Note:
AIP can be apply to non-office apps documents too
AIP users needs an AIP application to be install on their devices to be visible to the users to use it (PC or mobile or both, you could deploy Intune to push the application executable file into intune policy and than force apply the policy to user’s devices, just make sure user’s devices are intune managed )
With AIP users can track their documents, where is it, whom has it, whom open it, whom trying to access it, AIP users whom applied the AIP label has the permission to revoke access of a document from a user(s), also can track when has this document open and etc..
Faster propagation to end users (Less than 5 minutes)
Easy to manage for Global admins
A lot of automation action than IRM
*Note for RMS (IRM & AIP)
Office web apps don’t support opening protected RMS documents
Office web apps don’t support apply RMS
Choose Either one to deploy IRM or AIP. Don’t Activate both in a production environment!
Aloha (Hello)…I know there is the new feature from Microsoft, Azure Protection P2 where users can protect their attachments and etc. For short, double protection. This feature is actually another license (Azure License) is not include in the Enterprise licenses. Thus, you have to purchase it separately.
Anyway, this article is only for users/customer that doesn’t need double protection/smaller industry. I am more comfortable to activate RMS using the Azure classic portal;


 If you happen to have MFA enabled, AADRM module and the new AIP service module does support.