Understanding Needham & Schroeder protocol


Ahh cryptography, still finding which is the best video to clear up your understanding of Needham & Schroeder protocol? Well, look no more, here is mine in less than 8 minutes. I always thought I’m going to fail this class because from what I heard from my seniors is impossible to pass or ace this subject. I was so stressed and focus on the first week of this class, throughout this first week, and my first assignment hand out, I tell myself this ain’t that bad. Is actually an interesting subject if you give yourself time to digest.

How to create ISCSI Storage

https://www.youtube.com/watch?v=BoHLM2hsTok&t=272s


Yes, is Windows Server 2008 and Windows Server 2016. ISCSI Storage located at the Windows Server 2008 and the ISCSI Initiator is Windows Server 2016. This short video will explain how you could create ISCSI storage properly. Hope you enjoy it! Sorry, I sound slightly nervous.


How to create FTP in Windows Server 2016

https://www.youtube.com/watch?v=vXBXdeyh0WU&t=207s


Having a difficult time to sleep, so why not do a short video on FTP right? hahaha, Hope you guys enjoy it!

Before creating an FTP, you got to install or add from Server Manager > Add roles and features > Select Web Server (IIS) > Expand it > Select FTP Server. You got to manually check it.

Next, once you added the FTP server role and features, go to windows administrator to open FTP.

Factors for FTP;

  1. You got to create an FTP site
  2. Give suitable naming
  3. Site permission
  4. You got to make sure your application/appliance require SSL or not
  5. Virtual Directory
  6. Authentication type
  7. Credential access to the virtual directory, and which this credential will also be used by your application or appliance for authentication

PowerShell Script: Schedule Litigation Hold Enabled Exchange Online

To share how to perform enabled litigation hold for User Mailbox using task scheduler. However, this may trigger your security application/detection in your environment (a.k.a “Unexpected script ran….”). This blog requires you to know how to use Task Scheduler.

*Note:

  • If you don’t specify license type in your script, is alright, the script will skip that user and move on with another one.
  • Some license doesn’t provide the litigation hold feature, such as E1 license.
  • This script is not a limited capability.

There are pretty much lots of ways you could perform this.

  1. You could perform based by checking on the user’s creation date and litigation hold status.
  2.  You could perform based by checking on the user’s department and litigation hold status
  3. You could perform based by checking only the litigation hold status
  4. You could perform based by checking the license type and litigation hold status
  5. You could perform based all 4 above

Well, it all depends on the requirements and necessary in the environment.

When I was scripting it, I notice if to perform manually running the script is best to make use “function” type, to avoid duplication. Anyways,

If you are planning to have this in task scheduler, you could have this PowerShell script save in any windows platform that has Windows PowerShell with the required module installed.

Before moving on, 

You would need to manually run a retrieve of office 365 global admin credential, save and encrypted into a file. If you are terrified of the file being accessed by others, just make some security adjustments towards the file. 

References:

  1. https://practical365.com/blog/saving-credentials-for-office-365-powershell-scripts-and-scheduled-tasks/
#Name: Sabrina Kay
#Purpose: This powershell is to enabled litigation hold

function Run-LitigationHoldEnabled{
#Parameter to get the path
param([string]$FilePath)

#retrieve the path
$File = Get-ChildItem -Path $FilePath -Filter *.cred

#Identify the file path iss found
if($File -eq $true){

#Have to convert to string, or get only the name, because the type is File System type
$UserName = $File.BaseName
$PwdSecureString = Get-Content "$($FilePath)\$($UserName).cred" | ConvertTo-SecureString

#Create a storable attribute object for username and password, (passsword won't be shown in plain text)
$UserCredential = New-Object System.Management.Automation.PSCredential -ArgumentList $UserName, $PwdSecureString

#Connect to Exchange Online
$Session = New-PSSession -ConfigurationName Microsoft.Exchange -ConnectionUri https://outlook.office365.com/powershell-liveid/ -Credential $UserCredential -Authentication Basic -AllowRedirection
Import-PSSession $Session -DisableNameChecking
#Get user mailbox with litigation hold not enabled, set them to enabled
Get-Mailbox -RecipientTypeDetails UserMailbox | where-object {$_.litigationholdenabled -eq $false} | Set-Mailbox -LitigationHoldEnabled $true

#Finish and end session
Remove-PSSession $Session
}

Else{
#End Session if file path not found
    Remove-PSSession $Session
    }
}

#Main Program
#attribute for the office 365 credential file path
$KeyPath = "C:\xxx\"

#Task to run
Run-LitigationHoldEnabled -FilePath $KeyPath

Why can’t I use RODC DNS IP address on join to domain for client’s PCs?

What is RODC?

  • RODC stands for Read-Only Domain controller. Obviously, the name is the answer.

What is RODC purpose?

  • RODC act as a disaster plan or authentication for branches. RODC is deployed in a data center or at another site, it acts as a pull action. It pulls information and changes from the writable domain controller(s) only.

Why can’t I join to the domain on client’s PCs using RODC IP address?

  • Joining new PCs to the domain environment, this is considered as adding/modifying information and changes to the domain controller and this is the writable domain controller’s responsibility, not RODC.


Symantec ATP 3.x: Troubleshoot intrusion attack

If your environment is having Symantec ATP 3.x version and Symantec Endpoint Manager (SEPM 14), then you would probably face this situation before where ATP detected intrusion prevention.

So this blog would be about an attack which ATP detected as an intrusion and indeed ATP did block it instantly. The attack is unexpected overwrite of the SEPM file. However, there could some endpoints faced that their SEPM is disabled unexpectedly.

Hence, you may receive 5% of endpoints faced this attack. Yea, funny right? and another thing is that these endpoints are probably those turn on once awhile or not within the premises/environment often. Yes, you may guess it!

It was SEPM update. What causes the SEPM to disabled unexpectedly is failed IPS update and also possible the workstation didn’t get restarted often or properly.

You could run SymDiag on the endpoint device to get more details about the problem that the endpoint is facing, then you could find a resolution for this problem. Just reinstall the SEPM and run a scan and run SymDiag to make sure is working well.


Symantec ATP 4.x: High risk on Windows update en-us_win32.appx

Yes, Symantec ATP’s sandboxing does detect any bulk download and suspect it as a malicious download and you receive a high amount of high-risk endpoints prompt from ATP dashboard.

Sandboxing detected : en-us_win32.appx was downloaded from officecdn.microsoft.com.edgesuite.net

By looking at the URL of this download is pretty legit is from Microsoft Windows Update. Windows Update especially with GPO and WSUS environment, which windows update is run based on a fixed schedule set.

Well, there are validation process you could run to confirm that it is not malicious;

  1. Go to the endpoint device (phisically) which ATP detected as high-risk
  2. Open up Windows Update Log file as Notepad
    • You can find it from C:\Windows\WindowsUpdate.log
  3. Next, compare Windows Update log file with ATP alert details, on the timing and patch file
  4. If it is right then it is a legit patch file from Microsoft
  5. Next to double confirm, use VirusTotal website to scan the patch file and the URL to make sure it is legit
  6. To triple confirm, raise a case to Symantec support for further assistance on this case.

PowerApps: How to use PowerApps to build a Claim Form System?

I’m still a newbie towards PowerApps, so bear with me. Well, you can leave your comments below for me to improve or pinpoint my faulty parts. 😀

I have been occupied lately, and now only I got the time to do a blog on PowerApps. As you those that know me, I don’t do much of development coding like a software engineer.

So this is my simple claim form system, I am still improving it by adding conditions.

*Note

  • You may need to change the permission on this page to allow the only administrator to have edit rights and where employees have only created and view rights.
  • This Blog may require some basic knowledge and understanding of PowerApps and SharePoint Online

So let’s begin on the user experience;

  1. First, I go to “Claim Form” then it will open up Expense Form

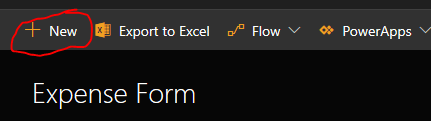
This is how it looks like under Site Contents > Expense Form.

expense.png

3. Select “New”

pa01.png

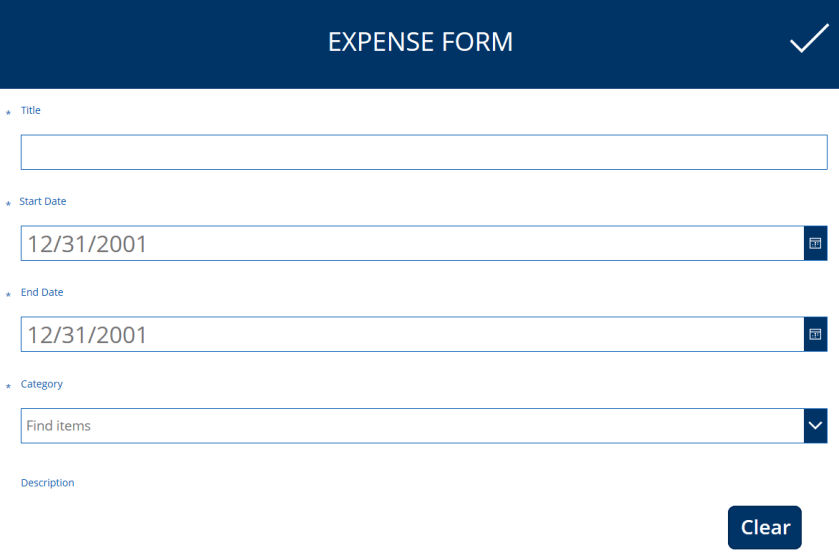
4. Then it will expand the Expense Form;

I’ve got 5 different lists;

  • Title (What is this expense form about, How should you name it)
  • Start Date
  • End Date
  • Category (such as Parking expense, food expense, petrol)
  • Description (Optional, for employees to explain)
  • Amount
  • Attachment

I’ve got 2 functions;

  • Submit button (is at the top right)
  • Clear button (basically it will clear the entire fill up of information)

pa02

pa06.PNG

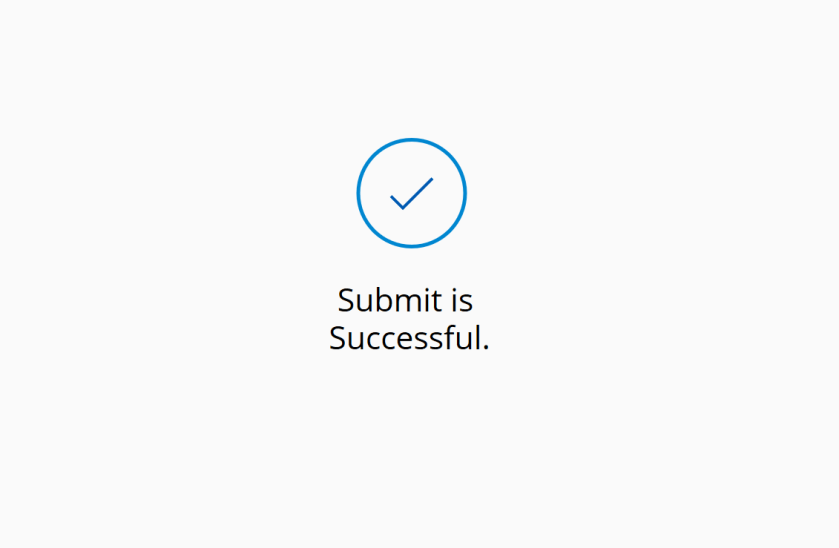
  • After successfully submitted the form, you will be direct to a successful page;

pa07.PNG

5. I even make few of the lists as a requirement to fill up, you could see a (*) at the lists.

6. After submitting an expense form, you will have a view of your submitted forms

  • Well, I am still trying to figure out how to not allow others to view others submitted claim forms though.

pa03.png

Now the PowerApps part…

  1.  Create a new page for your SharePoint site
  2.  Then create a new content type, “List”
  3. You have to create the PowerApps based on the expense form list

pa02.PNG

4. Create a New Blank PowerApps

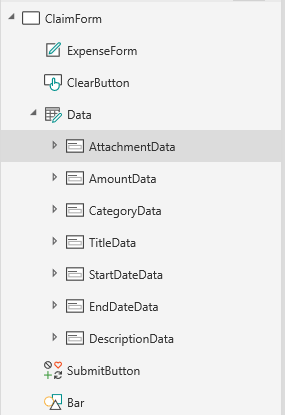
5. Then I created a new form and rename it to “ClaimForm”, the naming for each action are pretty straight forward. This form will include the necessary data for an expense form. (Sorry about the ordering)

  • ExpenseForm – Is a label
  • ClearButton – Contain action to clear and reset the form
  • Data – Is an Edit form type (multiple choice for type of data)
  • AttachmentData – for upload attachment
  • AmountData – fill in the amount of expense
  • CategoryData – select choice of expense type
  • TitleData – To fill in name of expense form
  • StartDateData – Select start date of this expense
  • EndDateData – Select end date of this expense
  • DescrpitionData – Include any necessary explanation for expense form
  • SubmitButton – Submit the form
  • Bar – Design of the Expense Form

pa06-1.png

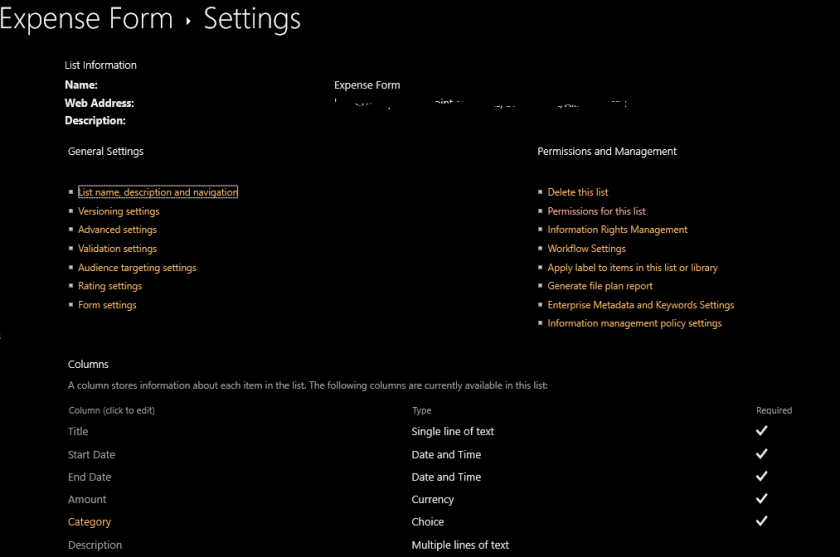
6. To include choice information for the category, you have to include it at the List Settings of this Expense Form in SharePoint Online.

pa01

pa07-1.png

7. For after successfully submitted of the expense form it will direct to a successful page.

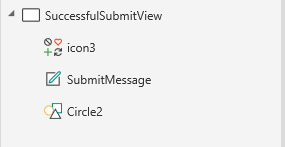
I created another new form and named it “SuccessfulSubmitView”

  • Icon3 – Design
  •  SubmitMessage – a successful message
  • Circle2 – Design


pa06-2.png

8. To have the expense form to direct to the successful page after successfully submit, you got to include action into the SubmitButton;

If(Rule1, SubmitForm(Data);
Navigate(SuccessfulSubmitView,ScreenTransition.Fade), 
SubmitForm(Data))

pa01-1.png

9. To clear the form, you got to include action into the ClearButton

ResetForm(Data)


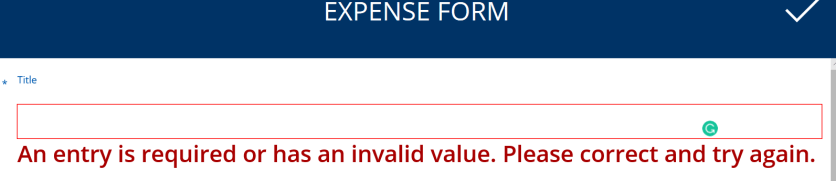
For exception, they have a default error action, you could edit that too. Example, if a data is not key in or the data doesn’t match with the condition it may have an error show.

pa01.PNG

That’s all you have to know about creating a simple claim form system. Well, yes there is room for improvement. I probably got to spend a bit of time for the improvement. Hope you enjoy this.


Cloud App Security: Scan and Track Azure Information Protected attachments

You can talk to your license vendor about purchasing cloud app security.

*Note

  • Make sure you have Azure Information Protection and FIle policy enabled to proceed with this task
  • Make sure you have App connector ready too

Once you got your file policy enabled and ready then you must perform some settings to allow cloud app security to scan for protected files.

So lets enabled the scan for protected attachments;

  1. Go to cloud app security portal
  2. Select settings icon on the top right then select settings

cas01

3. At the sidebar, you will notice under the category of “Information Protection”, Select “Azure Information Protection”

cas02.PNG

4. Here you will see 2 selection, on how you want cloud app security to scan your AIP files

  • You could have either one selected or both
  • The first one is meant for only scan NEW AIP files
  • The second one is meant for only scan AIP files that are not set by external tenant

cas03.PNG

5. Once this is enabled, then cloud app security will take less than 5 minutes to scan AIP attachments

6. Currently, I have an attachment with AIP applied, and cloud app security able to detect it. Below is an example, this is the only summary of the investigation of the file.cas04

7. To dig a deeper view of this file’s investigation and etc., you can select the icon at the side of the file.

8. Then it will expand with a list of options for you to choose to dig deeper

cas04.PNG


I would say it is indeed fascinating to see such a wonderful view of the deeper results of a file. FYI, I didn’t set up any File Policy so that Cloud App Security can detect AIP attachment. These are all purely from Cloud App Security Settings.


What to know about Symantec ATP 4.x?

Before you upgrade your Symantec ATP from 3.x version to 4.x version, there are few things you need to be ready before perform ATP software update to avoid any hiccups.

*Note

  • No fallback plan may cause redeployment to occur
  •  Lower version of ATP does not have the capability to restore the backup
  1. Read the release notes for 4.x version
    1. Take pointers
  2. Setup Backup at Symantec ATP
  3. Backing up ATP as a fallback plan

Hence, this overall process of the update may take an hour or 2 hours.


Reference

  1.  How to setup FTP