
Hey guys and girls, hope you guys are having a great weekend! Remember to stay healthy and stay safe as your priority.
Today’s blog is more towards talking about the Microsoft information protection labels, how to plan before deploying it. Each organization has their own preferences and requirements. Planning is a crucial part of every deployment especially when the deployment would have to roll-out to the users to use it for their daily work. Layman is the key to the users understanding.
Some organization have a compliance team and some does not have it. Having a compliance team would able to make this deployment much more clearer in terms of what the organization needs. If the organization does not have a compliance team, then we would help to identity together in terms what do they require only. Labels are structure in the form of priorities, so best to make it simple, and easier for administrator to manage too.
Phase 1: Give them the feel and look
Microsoft do provide default labels to organization, you can roll-out these default labels to smaller team or compliance team, allowing them to play around with it for a period of time. This allows them to have an idea how sensitive labels works and coming out a template would be easier for them. Having a template is the quickest way and easier way to roll-out the labels.
Phase 2: Feedback and Drafting Template
Getting feedback and drafting template phase, is a closer phase to rolling out the labels that suits the organization needs. In this phase, there are few items that you would need to involve into and would take a bit of time,
- Categories the labels based on location (Exchange online, SPO, OneDrive and etc)
- There is difference in terms of protection features for each location
- What can or can’t do in the labels
- Users description about the labels (keep it as layman as you can)
- Priority of the labels
- Design structure of the labels/sub-labels (Simple is better)
- Permissions (Flexible or Set)
- Action for the priority labels (Flexible, Warning or Strict-Justification)
- Customization notifications (Majority would decide to maintain the default, so you don’t need to spend too much time on this part)
Here are some design types that you can reference,
Design type 1
This design is for organization that would like to remain some default labels, and has new labels for other departments and its purposes. No sub-labels to be manage.

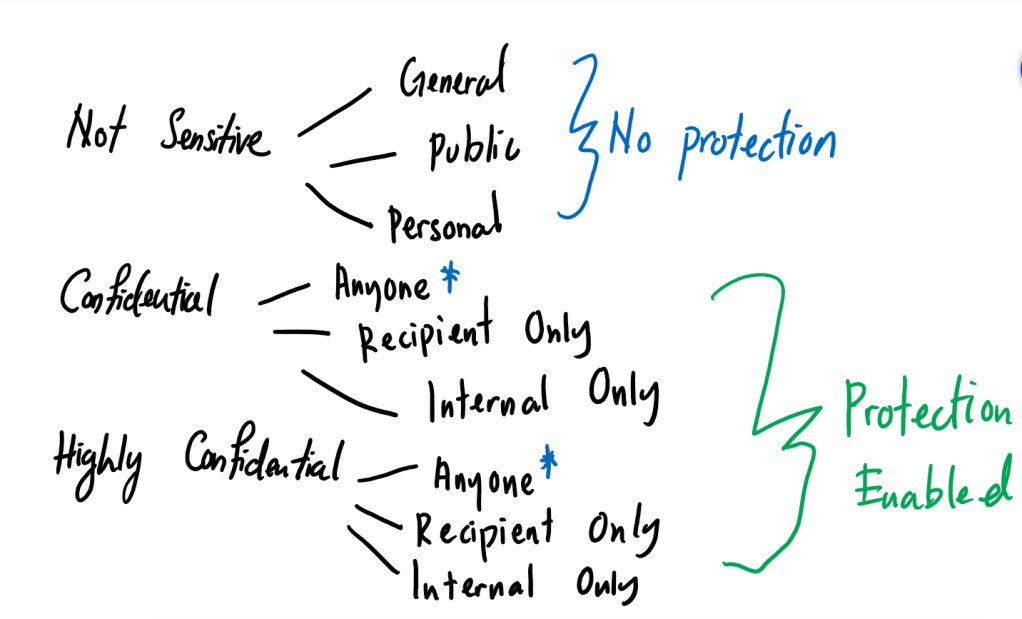
Design type 2
This design is for organization that would wish to keep some default labels but does not want to have other new labels to manage. Has sub-labels to manage.

Design type 3
This design is for organization that would like to manage their labels in the form of departments and with each department has their own labels. I wouldn’t recommend this though, because is complicated. As I mention earlier, labels are arrange in the form of priority.

Phase 3: Final Template
This is the phase where you can start to roll-out the final template of the labels back to the small team or compliance team to give it one last confirmation.
References:
- https://docs.microsoft.com/en-us/azure/information-protection/what-is-information-protection
- https://docs.microsoft.com/en-us/microsoft-365/compliance/sensitivity-labels?view=o365-worldwide
